6 Week Greenhouse in 6 Steps - for Less than $100

You can build this clever greenhouse for less than $100, in a little more than an hour. Just watch the video below to learn how!
About 6 weeks before your last frost date, you can start conditioning your bales inside the greenhouse. You’ll be amazed how quickly they generate heat and start warming up the air inside for your seed trays.
Once the risk of freezing temperatures is over, you can remove the plastic sheeting. Now your greenhouse is transformed into a lovely arched trellis, ready to support your climbing plants and vines. During the growing season, this structure becomes a magical, arched tunnel of vegetables, foliage and flowers.
To quote one delighted visitor at the 2019 Minnesota State Fair after she walked through our Straw Bale Gardens 6 Week Greenhouse display: “I know it’s food … but it’s really romantic!”
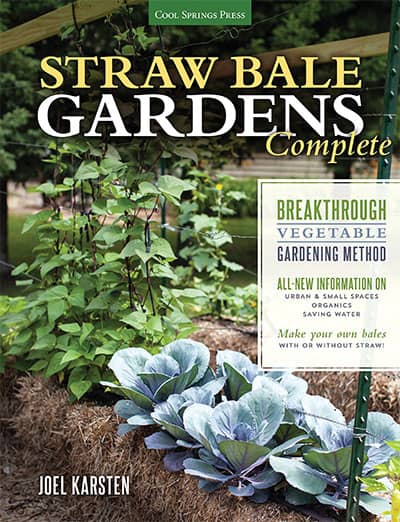
Got Joel's books yet? Just click below & get your copies now!

Hi, everyone. I am so excited to share with you how to build this six-week greenhouse.
If you’re like me, you’ve always wanted to have a greenhouse. You see your neighbors or friends with these big greenhouses, and you just wish you had one little corner of that greenhouse where you could start all your vegetable seeds for spring. I’ve got your answer.
For under 100 bucks, I’m gonna show you how to build your own greenhouse, about seven by eight and a half feet or so.
And, you’ll be able to heat it for free using straw bales. I can’t wait to show you this. Let’s get started.
This area right here happens to be where last year’s greenhouse was. So I took it down. This was the greenhouse and then it turns into the garden, which you’ll see later. So, this is the area where we’re gonna put this year’s greenhouse. And this is kind of what was left from last year.
So I’m gonna clean this up and then I’m gonna show you to setup the frame anew and show you exactly how to build it, step by step. So, let’s get started.
So, the first step is to clear away last year’s bales from last year’s garden. Mostly decomposed. Get them out of the way and throw them on a pile. We’re gonna make these into new bales later.
This will be fairly flat, not perfectly leveled.
Since our cattle panels are 50 inches wide, now we’re gonna use two of them. And then we need a little bit of overhang so that we can screw this board to this board. We’re gonna cut these off at 104 inches, which is eight feet eight inches, if you’re counting. And you just need to get close, it doesn’t have to be exact. So we’ll just mark one. Then we’ll lay the other one next to it and we’ll cut them both at once.
Sometimes you just wanna get the screw started, half an inch or so. So, it bites in and then you can drill the rest of the way in. There’s really no need to pre-drill these. These general-purpose screws are made to go right through wood, hold it together. And this is two by four, you shouldn’t have any problem with the wood splitting.
So that’s it, the frame is built.
Now we’re ready to put in the cattle panels and put on the plastic. This is the hardest part, I’m telling you.
Just tuck one end of the cattle panel into that side of the frame. And the other end goes in this side. So there’s not really a right end and a left end to these, But I like to put it so that the wires that run on the outside, the smooth edge of the wire, is facing up, ’cause that’s what’s gonna touch your plastic. If you put ’em inside out, or in this case, the other direction, then the cross wires would be on the outside and they would rub more against the plastic. They’re a little rougher. So just put ’em up, So that the smooth edge of the wire, the long strip, is facing the outside. Even if you get ’em upside down, it’s not the end of the world.
Once the cattle panels are in place, you’re gonna zip tie ’em together. That’s what holds the two pieces together. So you need seven or eight zip ties. Just put one, every other square. Usually works pretty well. That should take you eight or nine ’cause it’s 16 feet long. So, every foot or two feet or whatever, is good enough. If you’re gonna leave this up permanently, then you might wanna do is put zip ties on every square, just to hold them together. Zip ties are inexpensive, but if you take it down during the winter, every other square is plenty to hold it. I say to cut off the excess. I don’t know why, I guess it just keeps it neater. Doesn’t rub against your head when you’re walking around in the greenhouse. As you can tell, I’m six four, and I’m just touching the top of this greenhouse. I gotta duck just a teeny-tiny bit. So, the vast majority of you out there have no problem inside this greenhouse in terms of head height.
If you ever tried to set this up just using one, one cattle panel instead of two, you might discover that it’s a little bit more tippy in the wind. So you’re much more stable if you have two cattle panels at least, side by side. Tends to work the best.
The next step we’re gonna put these U-staples to staple the cattle panel wire onto the wooden frame. Probably just wanna use a couple of these. I think I’m gonna put eight of ’em in. The windier place that you live, the more staples you’ll probably wanna put in.
It’s also important that you secure this wood frame to the ground. If you’re doing this real late winter or early spring, your ground might be frozen. So if you’re thinking about doing this next spring, get your wooden frame in this fall and make sure it’s secured with some wooden sticks down into the ground a couple feet and screwed in place. Because that’s gonna help with holding it down in case of the wind.
I put some two by fours underneath the wire, just to raise the wire up a little bit, so that I can get the staple into the wood. It also helps raise the height of this wire up, just an inch or two which is really nice for me since my head is hitting the roof here a little bit. Okay, we got the staples in.
Now let’s put the pipe on the ends of the cattle panels. That’s the next step. I have used wood strips in the past. Can run a wood strip right along this outside edge, you kind of lay it up against this last wire and zip tie that on. That works okay but the 10 times I’ve done this, six or seven of those times I’ve broken the wood strip ’cause it’s hard to get home 16 feet long, and I don’t like to use two halves. So then you have the points that stick out.
So I discovered it’s less expensive, and actually works just as good or better. This is black polyethylene pipe. Super simple. Just get a roll of pipe, and all we’re gonna do is use some zip ties, again the magic zip ties. You zip tie this on. Again, you’ll need to put on, a zip tie on about every two or three squares. I guess if you’re gonna leave this up permanently and leave the plastic pipe on, you might do every one or every other one. Zip ties are cheap, so you’ll have, won’t have a lot invested in doing one at every corner, if you’d like. Just I would encourage you to leave the tails of your zip ties, your cable ties, pointing inside so they don’t rub against the plastic at all.
Basically all you need this pipe for, is something to hold the staples when you staple the plastic on. So, it’s not really structural, it’s not gonna support a whole lot of weight. It’s not gonna sport any weight. And then, once the plastic is all on and stapled in place, you’re gonna put a wide piece of tape along this corner anyway. So it kinda takes over the strength to hold the greenhouse together. And the staples don’t really do a whole lot of work at that point anyway. Staples and the pipe are just there to hold it in place long enough to get some good, sticky, strong tape on that corner.
So as you can see, we’re doing the same thing on the back, as we did on the front. One roll pipe. For the naysayers out there, I’m sure everybody’ll come up with a better material that you could use along the edges to work as your tack roll for staples. I could come up with a better one too, but remember, this is a $100 greenhouse. So we’re trying to stay under $100. So it’s not just about the ideal material, it’s about being cost-effective as well. So keep that in mind.
You’ll also see if you look on some of the social media channels like on YouTube, you might see other people that have taken this concept, this idea, and even taking it further, they put in solid walls in the end to make doors that you can walk through, wooden doors, et cetera. And that’s a great idea, but of course you have a lot more invested in that. And that is sort of a permanent greenhouse. That is you’re not gonna use it as a garden like we are this one.
Remember, this is only a greenhouse for six weeks, then it becomes a garden. The plastic comes off, and the cattle panels become the trellis for tomatoes and other kinds of climbing plants. Squash, last year I did some with morning glories, gourds, cucumbers. Basically anything that has a vine that climbs will climb right up this trellis. And you don’t have to put climbing plants on the bales that we use in this greenhouse either. You could just do your regular gardening here as well.
Next step, we put the plastic on. I like to pull the plastic all the way over the top, and then pull it down far enough that it covers the wood on the edge. So I have plenty of plastic to staple. Then I just like to tack a couple of staples in it to hold it long enough that I can cut the plastic on the other end. Those staples will come back out in a minute.
Okay, I like to pull the plastic over now that it’s stapled on the other side. And, before I unfold it all, I like to cut it off ’cause it’s much easier to do it this way. And if you pull it all the way down, so it’s tied against the wood on the bottom, that’ll be the perfect length. You see that the plastic has creases in it, where it was folded before it was rolled up. Use these creases to line ’em up with the wire, and you’ll make sure that the plastic is on straight. Again, I just like to tack a couple of spots.
(Giant gust of wind) Guys, you wanna pick the windiest day of the year, if possible, to put your plastic on. It’s not too bad today, probably a 10 mile an hour wind, but it’s plenty. (Joel laughs)
Having done this, now, cut the excess plastic off. It’s much easier than having to do it later inside the greenhouse. At some point we’re gonna put the straw bales inside the greenhouse. I find it’s much easier to do this before you get the ends of the greenhouse on, otherwise you get to carry ’em through the narrow door.
So right now I’m gonna put the straw bales in the greenhouse. I’ve got them handy, they’ve actually been sitting out over the winter. So they’ve been rained on, snowed on, rained on. They’ve even had a little bit of sun on ’em, but I haven’t started conditioning ’em yet.
So when you put the nitrogen on for the conditioning they’re gonna get hot. And this will keep the greenhouse warm at night, even though it’s still gonna get into the 20s, this time of year, my plants will be perfectly fine in the greenhouse, probably in the 50s or 60s with these bales inside there, keeping it nice and warm. So I’m just gonna move these inside, not positioning ’em exactly where I want ’em, but just so they’re inside the greenhouse so I don’t have to take ’em through the door later.
So the forecast this weekend is for more snow. We got the greenhouse about three quarters of the way done, but unless we put ends on, it’s not gonna hold in very much heat. So we’re gonna put the ends on this greenhouse and then put the zipper door in, the ZipWall zipper door.
So I’m gonna start on the other end, and then I’ll come back and finish this side. We’ll put the zipper in this end. So you’re gonna find this as a little bit tedious to do, but, it doesn’t have to be perfect. Remember, this is only gonna be up here for six weeks. So, as my dad used to say, we’re not building a church here.
Use the staples just to hold the plastic in place, the staples are holding the pipe long enough that you can get the tape on, that’s the most important thing. So right where these two pieces of plastic come together, that’s where you wanna lay your, at least one strip of tape on, later on. So I like to push the plastic inside. Then just pull it enough out that you can pull it around the corner and staple it into that pipe. So it’s kind of folded over on itself.
Basically, this whole thing is held together by zip ties and staples, you have to remember that . Zip ties and staples. And tape.
I like to put a staple in. Again at the top and the center. Then unroll just the amount of plastic you need to get to the bottom, and then cut it off before you unroll it. Just trust me, it makes it a lot easier if you do it that way.
Now you can unfold it and find the center. Use that line that runs down the center of the plastic, to line up in the center of your greenhouse, to the front. Now rolling the plastic under just a tiny bit just to create a little bit of a edge that we can staple into that pipe, right up on top. Get a couple staples started in the center top; that works easiest for me. Then I go to the bottom and tack the bottom.
Use that fold in the plastic to come down and find the exact center. Looks pretty close. Pull the plastic out so it’s tied between those two, fold it under just a little bit and tack it. And then start tacking it up and down in both directions, along this pipe. Now I need a staple every six inches or so. You give it a few staples at the bottom, where it comes to the wood. Now we’re gonna go to the other direction, work our way up the pipe. If you find a better way to do this, let me know, I’d love to know. I’ve done a few of these, probably 15 or 20. Several of them at fruit farms, early in the morning. And this seems to be the technique that works the best. But I’m always open to hear ideas. So if anybody comes up with something better, let me know. That has to be under $100, remember.
I was demonstrating this at the State Fair last year, and this old guy came walking by and, probably in his 80s or so, actually came riding by in one of his little, those fancy, electric carts. And he started telling me about his greenhouse. And he got out his phone and he showed me pictures. It was a stunning greenhouse. It was like this Victorian style. Beautiful greenhouse, exactly what I’ve always dreamt off. He said, “It has in-floor heat.” He’s telling me all about the tempered glass in it. And I said, “How much did that cost?” He said, “Had about 80,000 in it.” I said, “Well, I got about 80 bucks in mind.”
We both had a good laugh over that one! $80,000 for a greenhouse.
The next step is, I’m gonna put this tape right along the seam just three-inch wide tape. Works really well. We run it so it overlaps a little bit on the roof plastic and on the sidewall panel. Once it’s stuck to that plastic, the tape holds really well. You’ll actually probably tear the plastic before you’ll pull the tape apart. So, if you try to pull the tape off, it doesn’t come off very easy at all. So it adds a lot of strength. So it’s important to do that. Even if you put a couple of strips if you don’t get it exactly on straight, a couple of strips along the edge then make sure it’s pushed down nice against the plastic. That really adds a lot of strength. So this is an important step. Don’t skip this step of putting some tape on. Doesn’t really matter the tape, just make sure you put something on. The staples will loosen as it blows in the wind and the staples will come out after a couple days. So the tape really takes over and holds. So, tape both sides, both ends.
If you happen to ever punch a hole in your greenhouse, accidentally in the plastic, use some of this clear tape, packing tape, to seal up the hole as well. Once that little tear is started, the window push against it and you’ve actually have a great, big rip in your greenhouse. So having a roll this handy is probably a good idea anyway. This is not UV-resistant plastic, it’s just three and a half mil, regular old Peter’s plastic. This is a greenhouse plastic, so it’s not real tough stuff.
Remember again, six-week greenhouse, and inexpensive, is really what we’re looking for. So, don’t go whole hog and by fancy PVC greenhouse tape, you don’t really don’t need that. Simple packing tape will work fine. Next step, we’re gonna install this ZipWall zipper.
A lot of times drywallers will use these to separate two rooms when they’re doing remodeling and you put up a sheet of plastic, they gotta have a door to walk through. So they’ll use two of these zippers. They can zip them up on both sides and have a great big flap to walk through.
We’re just gonna put one zipper down the middle, in the front, and that allows to zip it open, walk in and out. Also let some air circulation if it gets too hot inside the greenhouse. So, let’s install ZipWall zipper. These are real easy to install. It comes with a little tool. You’re gonna use this tool to cut the plastic later on, but we’re gonna put this ZipWall zipper on before we ever cut the plastic. So I’ll show you how that tool works in a minute. They give you a new one in every box, apparently. This couldn’t be easier, comes with some other parts in there that you really don’t need. All you need is a zipper. It’s got a sticky back on the back. And, the end that has the zipper on it, that comes apart, this is the bottom of your door. So this goes on the bottom. The other end that has no zipper, that’s your top.
Now, by the way, this stuff is super sticky, so once you pull it off, sticks to everything.
So we’re gonna find this center, where you can see that seam from where it was, plastic was folded. And we’re gonna peel this zipper off at just the end of it, and get it started. I’m gonna place this right at the top. So we’re gonna have extra when we get to the bottom, but that’s okay. You’re gonna start this right at the top, right on that fold seam. And then just follow that seam down your door It’ll your door as straight as possible, doesn’t have to be perfect. Get to the end, you’re gonna have a little bit extra, but that’s okay. Make sure the zipper is stuck on real nice.
Then, you wanna open the zipper. The back of it will stick to everything so, don’t worry about that. Now that you have it open, you can use your fancy, shmancy little tool that they gave you, to insert it inside and cut the plastic. Poke it through the plastic, then follow the zipper down. And it cuts a nice little strip of plastic.
There you have it. Greenhouse with the door. Voila! It couldn’t be any easier.
One last step. I’m gonna cut this excess plastic off. Let’s fold it over inside here just to neat it up a little bit. You don’t have to do that, but, I like to keep it looking neat.
And that’s it. We’re done with our little six-week greenhouse. I hope you learned all the steps you’re gonna need on how to build it. Even if it’s not perfect.
Remember, it doesn’t have to be perfect. This is just for six weeks.
Tomorrow it’s supposed to snow here, believe it or not. So, tonight I’m gonna pour a little water on these bales inside, a little balebuster. Won’t take very long, these bales will be 140, 130 degrees. That’ll keep my greenhouse nice and warm, even if it gets into the 20s at night.
Later this summer, when it gets to be late May, and the weather’s nice enough here, we don’t have to worry about cold, we’ll pull the whole cover, all the plastic off of this greenhouse and we’ll plant those bales inside. And the tomatoes and cucumbers will climb over top of here and this will make a beautiful garden for the rest of the summer. And it’s attractive-looking as well.
So, from a greenhouse to a garden. So, you’ll come back and join us later and we’ll show you pictures and stuff on our site of what the garden looks like once the trellis is covered with vines and other vegetables. So, thanks for joining us. I hope you’ve learned how to build your own six-week greenhouse.